
Connector screens
This page names every control on the connector screens. For the concepts (kinds, lifecycle, direction), see Connectors; for what each connector connects to, see the Connector catalog.
Connector Manager
Section titled “Connector Manager”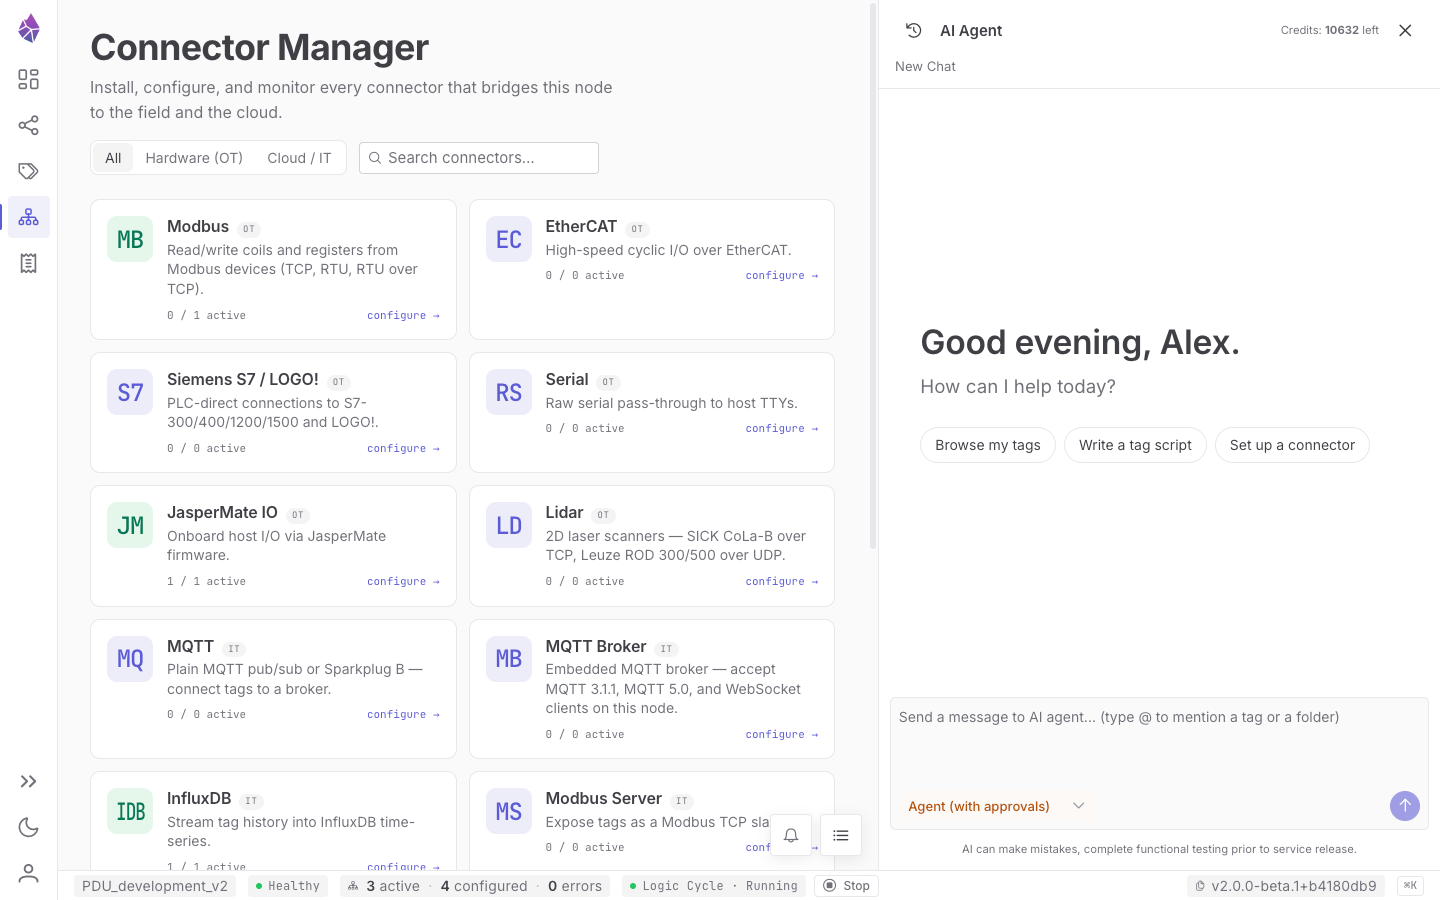
The screen has two halves: Connected (the instances you have configured) and Catalogue (the connector types available to this node).
| Control | What it is |
|---|---|
| All / Hardware (OT) / Cloud / IT filter | Narrows both halves by connector kind. |
| Search connectors… | Filters by name. |
| Connected | Every configured instance across all types (columns below). |
| Catalogue | One tile per connector type (below). |
Connected table columns
Section titled “Connected table columns”| Column | What it shows |
|---|---|
| Name | The instance id. |
| Type | The connector type, with its icon. |
| Status | A live status pill (Connected, Stopped, Error, …). |
| Latency | Round-trip time for the last exchange (where applicable). |
| Enabled | A toggle that starts/stops the instance. |
| Configure | Opens the instance in its type’s page. |
Catalogue tiles
Section titled “Catalogue tiles”| Element | What it is |
|---|---|
| Freshness row | When the catalogue was last checked, plus Check now. Offline is a normal state — installed connectors keep running; you just can’t add new ones until the node can reach JasperX. |
| State badge | Installed (on this node), Not installed (available to install), Removed, Unavailable. |
| Description | What the connector is for — the same sentence used in the catalog reference. |
| Version line | Which version this node is pinned to. An Update ready flag appears when a newer one is staged. |
OT / IT + counts | The connector’s kind, and how many of its instances are active / total. |
| Install / Configure | Install downloads and installs the type; once installed the button becomes Configure and opens the type’s page. A removed type offers Restore. |
| ⓘ About | Opens a card with When to use it and On this node (installed version, instances, what it is doing right now), plus install / update / roll-back actions. |
A connector type page
Section titled “A connector type page”Opening a type (e.g. Modbus) shows a header with its name, a one-line description, and a ← Connector Manager back-link, then an Instances tab — and, on connectors that support direct device access (currently Modbus), a Bench Tools tab.
Instances tab
Section titled “Instances tab”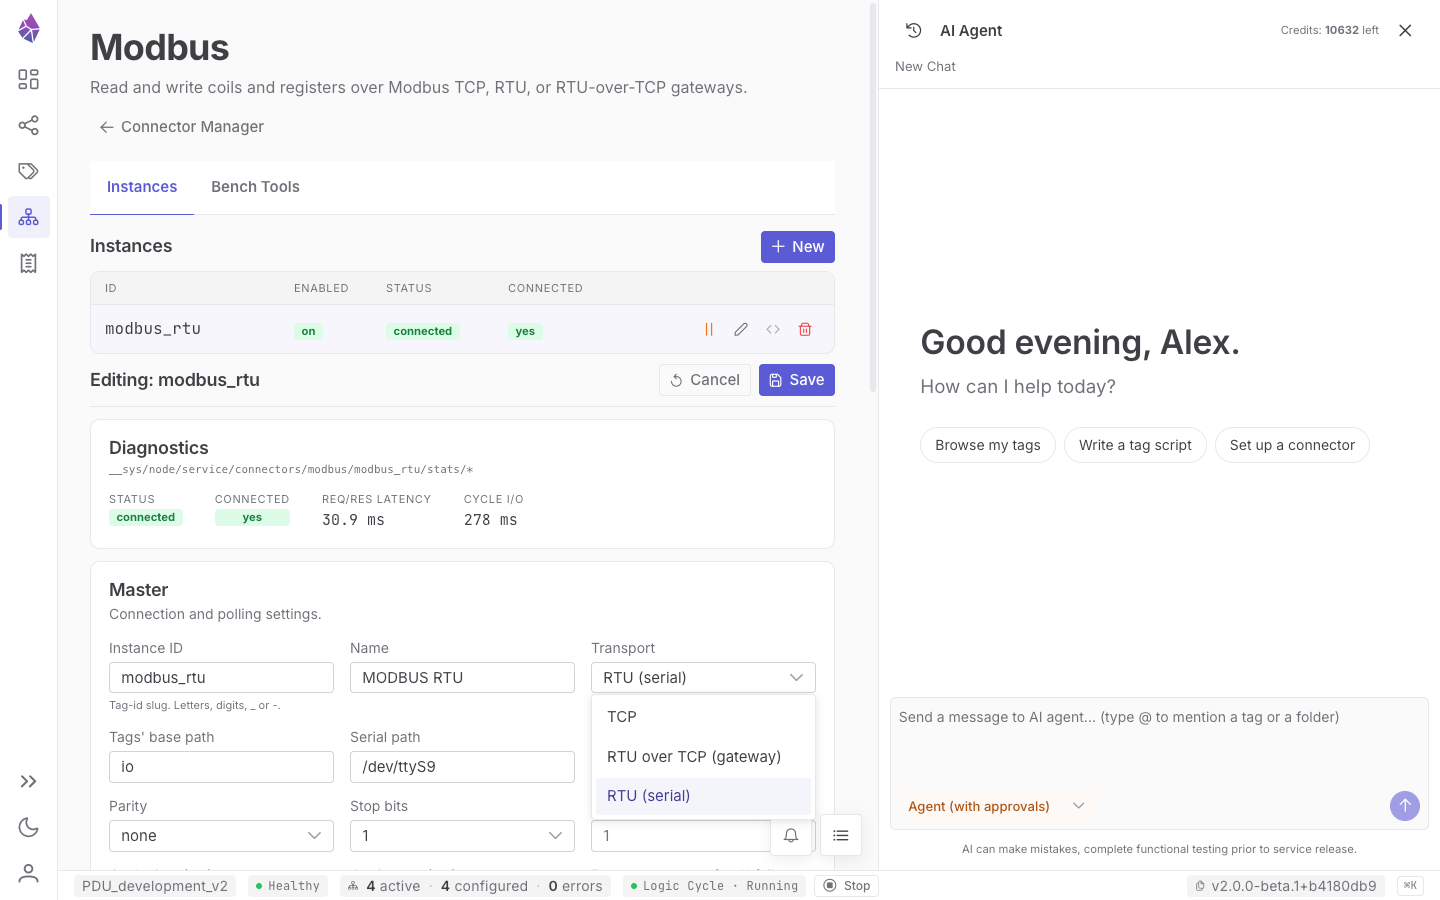
| Control | What it is |
|---|---|
| + New | Creates a new instance of this connector type. |
| ID / Enabled / Status / Connected columns | The instances and their live state. |
| Enable connector (▷) | Starts the instance (turns enabled on). |
| Edit configuration (✎) | Opens the form editor (below). |
Edit config JSON (<>) | Edit the raw configuration directly. |
| Delete connector (🗑) | Removes the instance. |
The configuration editor
Section titled “The configuration editor”Editing an instance opens a form split into Master (connection), Mapping (the tags), and a live Diagnostics panel, with Cancel / Save at the top. The fields below are the Modbus example; other connector types have an analogous, tailored set.
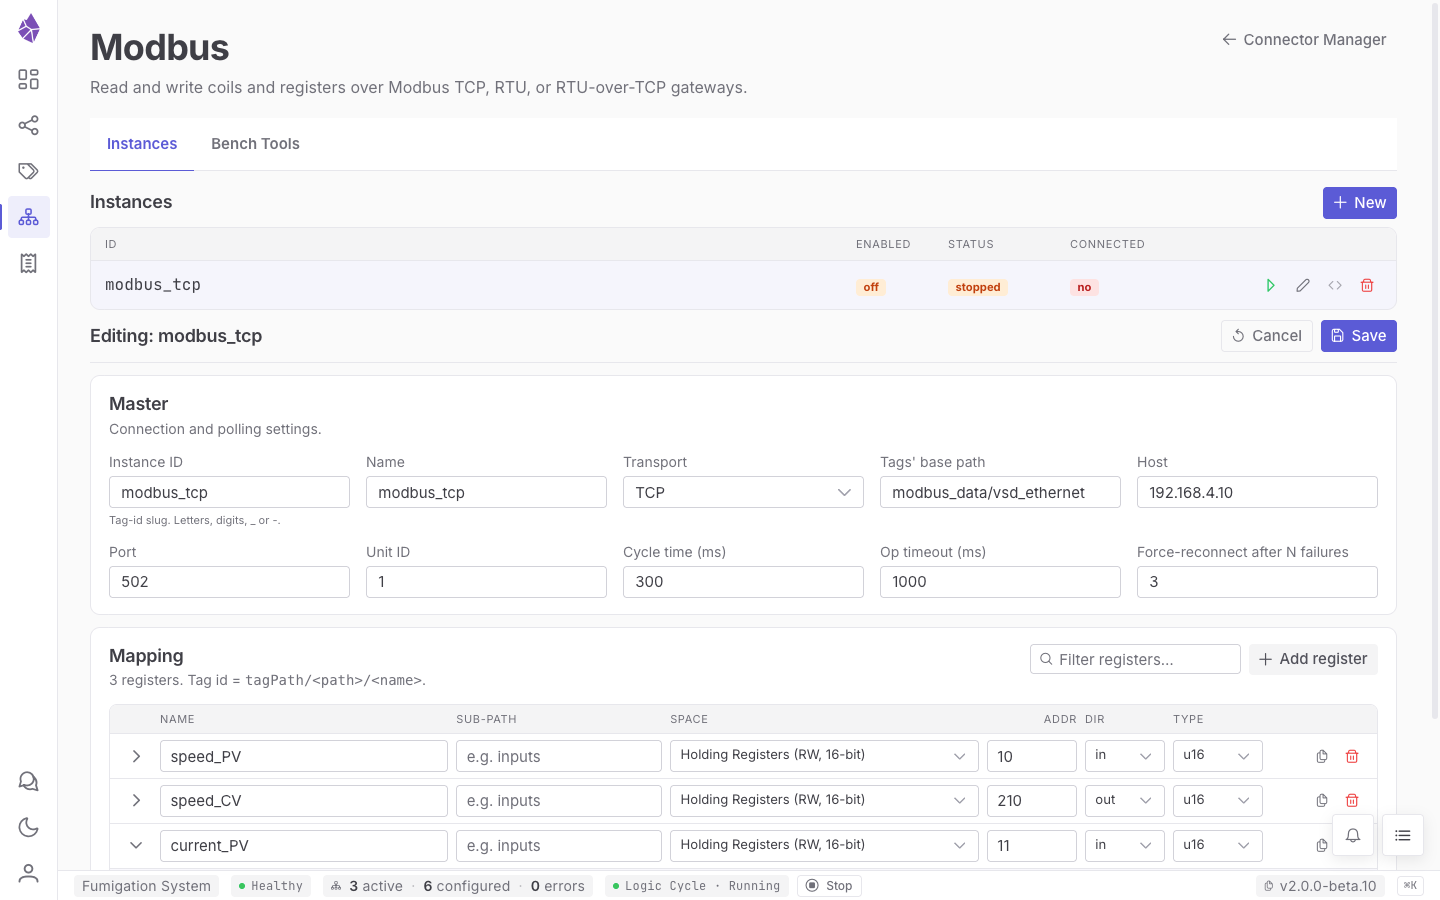
Master (connection & polling):
| Field | What it is |
|---|---|
| Instance ID | The id/slug for this instance (letters, digits, _, -). |
| Name | A human-friendly label shown in the IDE. |
| Transport | How to reach the device (e.g. TCP, RTU). |
| Tags’ base path | The folder the connector creates its tags under. |
| Host / Port | The device address (TCP). |
| Unit ID | The Modbus slave/unit address. |
| Cycle time (ms) | How often the connector polls/exchanges. |
| Op timeout (ms) | How long to wait for a single operation before failing it. |
| Force-reconnect after N failures | Drop and re-open the connection after this many consecutive failures. |
| Batch adjacent reads | On by default. Off = every input gets its own request. |
| Batch adjacent writes | On by default. Off = every ungrouped output writes on its own. |
On a serial transport the address fields change to suit it — Serial path, Baud rate, Parity and Stop bits in place of Host / Port.
Mapping (one row per value):
| Column | What it is |
|---|---|
| Name | The tag’s name. |
| Sub-path | An optional extra folder under the base path. |
| Space | The register/area (e.g. Holding Registers). |
| Addr | The numeric address. |
| Dir | Direction — in (device→tag) or out (tag→device). See Direction. |
| Type | The data type (e.g. u16). |
| ▸ expander (row caret) | Opens the row’s per-register settings — bit, Unit ID override, raw offset, grouping (below). |
| copy / delete (row icons) | Duplicate or remove a mapping row. |
| Filter registers | Filters the mapping list. |
| + Add register | Adds a mapping row. |
Grouping — controlling how registers share a request
Section titled “Grouping — controlling how registers share a request”By default the connector merges neighbouring addresses into as few requests as possible, in both directions. Some devices don’t cope with that, and some need the opposite — several registers landing in one write so the device sees them change together. Both are controlled here.
The two Master checkboxes turn automatic merging off wholesale, per direction. Turn Batch adjacent reads off for a device that misbehaves on multi-register reads, and Batch adjacent writes off for one with no multi-write support (each output then writes on its own). Explicit groups, below, still batch either way.
Expand a mapping row for the per-register controls. They follow the row’s Dir, so an input shows the read pair and an output the write pair:
| Control (input rows) | What it does |
|---|---|
| Read group | A name. Every row sharing it is fetched in one request, gaps included. |
| Read with its own request | Never merge this register with its neighbours. Unavailable if it’s in a group. |
| Control (output rows) | What it does |
|---|---|
| Write group | A name. Every row sharing it is written in one operation, together. |
| Write on its own (never batch) | Never batch this register. Unavailable if it’s in a group. |
Three things to know:
- Group membership is by name. Every register in a block must carry the exact same string.
- A read group may span gaps; a write group must be contiguous. Reading a few extra registers is harmless, but writing across a gap would overwrite whatever sits in it, so the form rejects a write group with holes.
- Editing any of these restarts the instance — grouping changes the request layout, so it isn’t applied in place.
Reach for a write group when a device rejects single-register writes, or when a command word and its value must arrive together. Reach for a read group when the values you need are scattered (say 100, 104, 108) and you’d rather pay for one request than three.
Diagnostics panel (read-only, live): the instance’s Status, Connected, request/response
latency, and cycle I/O timing — sourced from
__sys/node/service/connectors/<type>/<id>/stats/*.
Bench Tools
Section titled “Bench Tools”A per-connector-type workbench for direct device access during bring-up and diagnostics, independent of any configured instance. It connects on its own using the Host / Port / Unit ID fields at the top, then offers (for Modbus):
| Tool | What it does |
|---|---|
| Probe device | A read-only scan that reports which addresses respond and which return errors — so you build your config from addresses that actually respond, not from a datasheet alone. |
| Detect byte order | Helps determine the device’s word/byte ordering. |
| Read | Reads specific addresses on demand. |
| Write (marked destructive) | Writes a value directly to the device — use with care; it changes the real device. |
| Run | Executes the selected tool. |
Bench Tools is the fastest way to sanity-check wiring and addressing before you commit a mapping.